DIY Soak Off Gel tutorial:
(Optional Steps)
1. Softens and cleans the callus with cuticle softener .
2. Clip your nail to a good shape.
3. If your nails are oily type, please file and smooth out the nail surface a bit (should be slightly done.)
*Please remember to clean up your finger nails after any pre-treatments.
If you skip the above steps and you may start now!
1. Dehydrate your nail surface with gel nail cleanser. (If you want a longer lasting result, you may choose to use primer)
2.
Evenly apply a thin layer of Base Gel (the control of the thickness
should be fine after several practices.) Due to different quality, the
base gel of some brands would be shrunken after UV/LED cure, in that
case, just reapply the losing part would be okay. The tricky is to
leave a very narrow gap between the base gel and the skin. Use a wood
stick to clean up the edge before any light cure if you did.
3. Remove the tacky residue with gel nail cleanser.
4.
Apply a thin layer of Color Gel evenly and cure under the LED/UV lamp.
It is always the same way in all steps of light curing. Apply a second
layer of Color Gel and cure under the LED/UV lamp again. (Tips:
sometimes when the color is difficult to apply evenly well or always
leaving brush strokes, face your nail down to the floor and the gravity
would bring the gel goes evenly due to the tractility of the gel.)
5. Apply a thin layer of Top Gel and cure under the :ED/UV lamp.
6. Remove the tacky residue with gel nail cleanser. You are DONE!
Above
are the basic steps for single gel nail color application. If you want
to make a french nail style, you may take a reference from my tutorials
below:
French Nail Tutorials:
1. Preparation:
French nail sticker, two gel nail brush, gel nail cleanser, cleaning
cloth, clear gel, pink color gel, white color gel, Base Gel, Top Gel
and UV/LED cure lamp.
2. Follow the above basic steps to apply the
pink color gel. If you want natural french nail, apply one layer of
clear gel instead of two is fine.
3. Remember to remove the tacky residue with gel nail cleanser. (To ensure the surface is clean and dry enough for sticker.)
4.
Place and adjust the french nail sticker before you stick it tightly.
Ensure there is no air leaving under the edge of the sticker.
5.
Apply white color gel at the front area on the nail as doing basic steps
above. You will find that it is much easier to do french nail with the
french nail sticker aid :)
6. After cure the white color gel under
UV/LED lamp, remove the sticker slowly from one end to another end in
one direction. A tidy and pretty arc is coming out!
7. Apply the clear gel to smooth out the little arc platform created by the french white edge. Cure under the UV/LED lamp.
8. Apply the Top Coat Gel and cure under UV/LED lamp, remove the tacky residue with gel nail cleanser. DONE!!!!

If you want some advance decorations on tradition french nail, you may try the follows:
1. Little glitter beads
For beginners, you can utilize the arc platform to hold the glitter
beads at the arc, or use normal clear nail polish as glue to hold the
beads at the right place you want. Apply clear gel to secure the beads
and finish with Top Coat.
2. Drawing a bling bling liner
A very easy and good way to decorate french nail is to draw a bling
bling liner along the arc. It is not only can decorate your nail, it can
also embellish the arc line if the edge have been failed to be created
perfectly.

To Remove the Soak Off Gel:
We
need to soak the gel with the gel-remover. Wraps the nail with a fully
soaked cotton in a piece of tin-foil, when the remover soak through the
gel, it will drop off from the nail. However, it may not 100% drop off,
a little scratch may be needed.
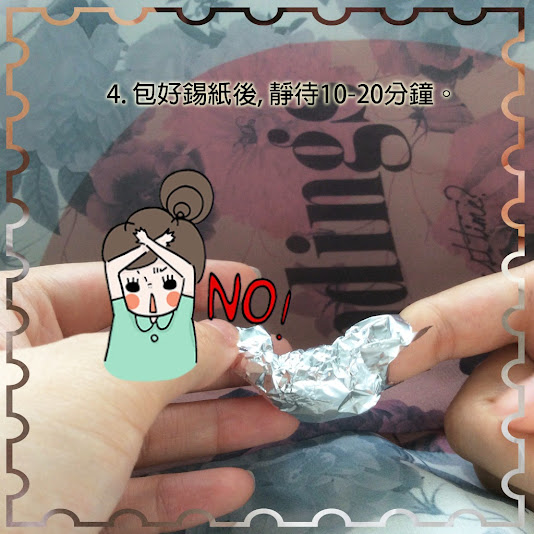
For the tradition soaking methods,
several materials you needed to prepare (cottons, tin-foil, remover,
wood-stick) and several steps you needed to take: tear cotton to the
sizes fit your nails, cut tin-foil into to pieces, soak the cotton fully
with the remover and stick close to the nail, wrap the nail with the
tin-foil and wait for 10-20 minutes.
For our newly recommended soak off pad, only one step you need~ Let's see the below pictures and find out the differences.
Traditional soak off method:


Newly Soak Off Gel Remover Pad method :

Please click
here for more details of the remover pad, thank you!