2014年5月27日星期二

星座行星的解說 - 第二篇

星座行星的解說 - 第二篇

繼上次<<星座行星的解說 第一篇>>簡單講解了有關太陽、月亮及上昇星座三個的產生和在個人方面所代表的意義後, 今天要給大家再逐個講解包括太陽在內的十大星體本身在宇宙間及個人星盤上所代表的意義。

這篇依次會講到的行星有: 太陽、月亮、水星、金星、火星、木星、土星、天王星、海王星及冥王星。

太陽


太陽是個發光體,提供地球光和熱,孕育天地萬物,生生不息。因此占星學者認為太陽是生命能量的來源,屬於吉星同時亦是獅子座的守護星主宰人們的生命力與創造力,象徵個人的能力、精力與權力,此即太陽的三力說。本命盤中太陽所在的星座,代表個人主要性格。太陽所在宮位,代表人生所追求的生活領域。在六親方面,太陽為白天盤的父親自然象徵星,以及女命的丈夫。在身體器官方面,太陽代表心臟與背部等。此外,太陽還象徵著權勢,因此與上司、名望、地位有關


月亮


月亮是距離地球最近的星體,受到物理的引力作用,影響著潮汐的漲潮與退潮。因此占星學者認為月亮屬於吉星,同時是巨蟹座的守護星。主宰人們的情緒波動與情感狀態,屬於內心層面的作用力,如同大家常聽到的「月亮代表我的心」一樣。本命盤中月亮所在的星座,代表著對於情感的表現方式,月亮所在的宮位,則代表個人情感所表現的生活領域。在六親方面,月亮為夜間盤的母親自然象徵星,以及男命的妻子。在身體器官方面,月亮代表胃、胸部、乳房等。月亮運行速度快,二十八天即可走完整個黃道十二星座,因此常可辨別出生時間相近的人之性格差異。


水星


水星是離太陽最近的一顆星,常伴隨於太陽左右。自古太陽都是天上的國王,而水星就像是國王的使者,在兩端傳遞訊息,負責溝通協調。因此占星學者認為水星象徵著思維邏輯、溝通能力、商業交易等。屬於中性星,同時是雙子座和處女的守護星,象徵著個人的心智活動及思維邏輯。本命盤中水星所在的星座,代表著個人的思維運作方式,水星所在的宮位,則代表個人常思考的生活領域。在六親方面,水星為弟妹的自然象徵星。在身體器官方面,水星代表手臂、支氣管、神經等。水星具有雙重性特質,主宰著買賣交易行為,因此代表了狡詐的欺騙行為。


金星


金星是由羅馬神話中主宰愛與美的維納斯女神所守護,因此占星學者很自然的就以金星作為藝術、美感、愛情的象徵星。由於這些象徵都涉及感官式享受,所以金星也代表著娛樂、社交、音樂、美食、鑑賞、享樂等。乃占星中之第二大吉星,同時是金牛座和天秤座的守護星。本命盤中金星所在的星座,代表著個人對愛情的表現方式、審美觀以及社交的態度。金星所在的宮位,代表著生命中展現浪漫、和諧、舒適的生活領域。在男命中,金星常是其喜歡的類型,在女命中,則代表自己希望成為的類型。在身體器官方面,金星代表著喉部、腎臟等。


火星


火星是由羅馬神話中主宰戰爭的馬爾斯戰神所守護,因此占星學者很自然的就以火星作為暴力、競爭、野心、軍事的象徵星。由於這些象徵都涉及壓制或衝動的表現,所以火星也代表著個人的爆發力、性衝動與征服慾等。屬於占星中的第二大凶星,同時是牧羊座與天蠍座的守護星。本命盤中火星所在的星座,常代表著個人的慾望表達方式與發脾氣的樣子,火星所在的宮位,代表著個人所渴望的生活領域。在六親方面,火星是兄姐的自然象徵星。在男命中,火星代表其對性愛的態度,在女命中,火星則代表著其喜歡的男性類型。在身體部位方面,火星代表頭部、生殖器官、血液等。


木星


木星是占星學第一大吉星,象徵著擴張、成長與幸運,是射手座和雙魚座的守護星。在精神層面,占星學者認為木星代表著宗教、哲學、道德、高等教育及幸運等;而在行為層面,木星則代表長途旅行、國外事務等。由於木星乃正直之星,所以也與法律領域有關。木星所在的宮位,代表著容易獲得機會與利益的生活領域。在身體方面,木星代表肝膽、大腿及臀部等。


土星


土星是占星學中的凶星,象徵著限制、收縮、不幸與困難,同時是山羊座和水瓶座的守護星。在精神層面,占星學者認為土星代表著悲觀、壓抑與責任;而在行為層面,土星則代表傳統與保守。在身體部位方面,土星代表牙齒、骨骼、皮膚等。由於土星有著緩慢的特質,因此在卜卦占星中也代表著老人。


天王星


天王星水瓶座的守護星,屬於凶星,象徵著無預期、變革、顛覆、分裂、電子等。由於天王星屬於世代星,若與本命盤中個人行星產生相位時,才應予以分析。一般來說,天王星不宜落在家庭宮或夫妻宮,容易產生分離的現象。天王星代表的人物有科學家、革命家、發明家等。


海王星


海王星雙魚座的守護星,屬於凶星,象徵著朦朧、無邊界、弱化、模糊、幻想、犧牲與救贖等。由於海王星屬於世代星,若與本命盤中個人行星產生相位時,才應予以分析。一般來說,若是命盤中若是海王星受剋嚴重,將不宜經常靠近海邊。海王星代表的人物有藝術家、靈修者、修行者等。


冥王星


冥王星天蠍座的守護星,屬於凶星,象徵著摧毀、重生、慾望、死亡、極端、無意識等。由於冥王星屬於世代星,若與本命盤中個人行星產生相位時,才應予以分析。一般來說,若是命盤中冥王星受剋嚴重,命主可能具有暴力傾向。冥王星代表的人物有心理學家、獨裁者、軍警、黑道等。在身體器官方面,則代表生殖器、肛門、直腸等。


在我們的星盤中, 每個行星上對應著的星座性格就影響了我們在人生中各方面的表現, 舉個例說: A君的太陽星座是獅子, 平時為人開朗健談, 但若他的愛情代表行星落在天蠍座的話, 那麼他在愛情方面便不會很獅子, 相反, 會是很沉默冷靜的天蠍行為。因此找對象還要注意對方的愛情星座是否與你合適啊~! 同時還有十二宮位命運的影響。

2014年5月10日星期六

DIY Soak-Off Gel 教學 (包括卸甲程序)

DIY Soak-Off Gel 教學

(選擇性步驟)
1. 以死皮軟化液/浸手盆先將死皮軟化
2. 把過多的死皮, 倒刺等用死皮剪剪掉
3. 修剪好甲形
4. 用豆腐挫輕輕去除指甲表面的不均、油脂及平滑度(切勿過量傷及指甲)
記得清除好打磨後的指甲粉屑喔.

如果不需要以上步驟, 即清潔好雙手後馬上就可以開始囉~

1. 先用沾有指甲清潔液的潔甲棉清潔甲面 (如想提升持久時間, 可改為使用primer)
2. 平衡地薄薄地塗上Base Gel (這個所謂薄薄地平衡地需要慢慢掌握, 個人經驗是Base gel剛好覆蓋甲面而沒有厚薄不均的情況, 但這得基於不同gel牌子的黏調度而調節, 有些牌子甚至照燈後會出現縮膠的情況, 需要補塗) 最重要是不要塗到皮膚上
3. 以沾有指甲清潔液的潔甲棉清掉照燈後未硬化的Base Gel
4. Base 做好後, 就可以開始Color Gel 了, 方法其實與base gel一樣, 每層要薄、均勻, 可重複2-3次以達到理想色澤 (有人經常會質疑為何圖片中的顏色或塗在假甲示範的顏色往往與自己塗的有點不同, 其實原因有幾個, 一) 假甲片通常是透明/白色的, 而你的手指是肉/粉色的, color gel多少是帶透明感的, 難免會有色疊的問題; 二) 假甲片沒有知覺, 不會灼痛,  廠家當然可以厚厚的塗上照燈, 管它熱度多高, 然後展示時再告訴你此效果是塗兩次, 我們薄塗的嫩手當然要多做幾層才達到囉; 三) 拍攝燈光與電腦顯示屏的差異
5. 遇到較難塗均勻的顏色如糖果色時, 可以將指甲面向下, 利用gel的延展性及地心吸力自動把gel微調均勻後才照燈
6. 完成color gel 後上Top Gel就完成啦~!
以上為中基本的單色gel 甲, 相信很多人除此以外就是最想自已DIY法甲吧.

以下就來個法甲教程:

1. 準備好微笑貼、兩支光療筆、潔甲液、潔甲棉、粉色color gel、白色color gel、 Base Gel、Top Gel、光療燈。
2. 如上述完成Base層後塗粉色color gel。(如常用自己指甲原有色可忽略color gel這一步)
3. 完成color gel後記得潔甲, 確保表面乾爽
4. 把微笑先從正中位置輕輕貼住以調整理想白邊空間, 確定後把貼紙緊緊的按貼服, 尤其將面對白邊的那邊一定不可以有隙
5. 貼好後就可以在前端位置填上白色color gel 啦, 沾到貼紙上也不用怕, 儘管輕鬆填色~ 大概2-3層後已達理想白色效果
6. 可從微笑貼的其中一邊開始順勢慢慢撕掉貼紙 (每次見到整齊的彎線就很開心)
7. 按捺住興奮的心情, 塗上兩層Top Gel就完成啦!!!!

當然, 愛美的女人很快就不會滿足於傳統的法甲!

以下再提供一些別的花款:

1. 點小鋼珠
    初學者可以好好的利用撕掉微笑貼後出現的小台階去穩住小鋼珠, 在適當位置上塗上普通透明指甲油充當膠水, 用點鑽筆把小鋼珠放到適當位置, 黏好後就可以多塗上幾層 Top Gel穩定及封好啦
2. 畫銀線
     另一種常見的花款就是沿著法甲邊畫上銀/金線, 簡單點的做法就是塗上帶有閃片的指甲油or Gel, 最後塗Top Gel.


以下是Soak Off Gel卸甲教學:

Soak Off Gel的卸甲方法是以卸甲水浸著甲面, 待卸甲水完全滲透Gel中, Soak Off Gel便會漸漸脫離甲面, 可以安全卸除。Soak Off Gel的卸甲方法相對傳統Gel甲安全, 不用打磨指甲, 因此很適合家用, 不過相對要使用的工具則較多, 步驟亦有點累贅, 因此我們引入了專門卸Soak Off Gel 的卸甲包, 有別傳統的多步驟, 輕鬆一包完成! 省步驟、省時間、省金錢!
以下來個傳統Soak Off Gel卸甲圖片與卸甲包的示範:


卸甲包一包搞定~

夠時間拿掉錫紙/卸甲包後, 會有各種情況出現, 最理想為整塊gel完全卸脫, 其次是碎掉; 而一般情況下仍然會有一點殘留gel黏在甲上, 原因多種, 輕者只需以木棒或推皮棒輕輕推走, 重者則可能要重複步驟。

最後來些基本常見的問題: 

Q: Soak Off Gel跟普通Gel有什麼分別?
A: Soak Off Gel是近年最新研發革命性的美甲家用產品, 不用打磨, 只需浸泡就可以輕易卸掉彩膠。 由於是家用品, 因此與專業甲店質地相比會較易操作, 但會較透薄、幼滑、多色、安全。

Q: 是否所有甲質/孕婦都適合做Soak Off Gel?
A: 基本上每位擁有健康指甲的人都適合做。由於soak off gel是使用光療硬化, 不含Acetone, 因此絕不傷害人體。

QSoak Off Gel可維持多久? 如何卸除?
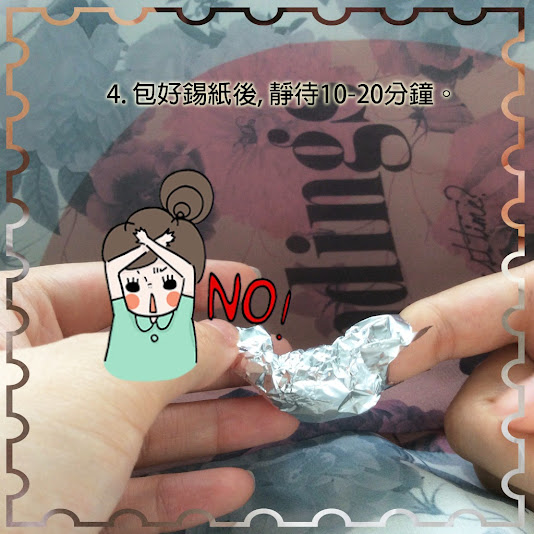
ASoak Off Gel雖 然是專為家用者而設, 但其維持度亦可長達兩至三星期之久。卸甲時, 先使用卸甲液沾濕棉花, 覆蓋於指甲表面, 再用錫紙包好, 薄款5-10分鐘, 厚塗款15-20分鐘。夠時間拿掉錫紙/卸甲包後, 會有各種情況出現, 最理想為整塊gel完全卸脫, 其次是碎掉; 而一般情況下仍然會有一點殘留gel黏在甲上, 原因多種, 輕者只需以木棒或推皮棒輕輕推走, 重者則可能要重複步驟。針對卸甲的繁複工具步驟, 我們引入了非常方便的Soak Off Gel Nail 卸甲包, 請到這裡參考。

Q: 可否用普通洗甲水卸Soak Off Gel甲?
A: 雖然並非完全不可行, 但Soak Off系列產品卸甲時, 因製作時的厚度及產品性質, 需浸泡5-20分鐘, 如以普通洗甲水浸泡卸甲, 除可能需更長的浸泡時間外, 更可能傷害手指及令指甲變得乾燥發黃等。

Q:  為什麼要潔甲? 什麼是未硬化gel?
A: 照燈後, 甲面上會留有一些黏黏的東西, 就是未硬化的光療膠, 可以用光療清潔液輕輕抺走, 避免弄花表面光滑度。網上有流傳使用消毒酒精潔甲, 其實亦無不可, 但必須視乎不同牌子而論, 試過有某牌子用消毒酒精抺會令甲面失去光澤起霧。我們建議客人儘量使用該品牌提供的潔甲液(如有), 另外消毒酒精則可以用來清潔美甲工具如畫筆等, 可節省金錢。

Q: 為何我的Soak Off Gel總是過了數天後便一片片的翹起脫落?
A: 此情況有數個原因:
1) 塗Base Gel的時候邊緣蓋到指甲緣上, 尤其是尾端的死皮位置。當指甲持續生長時, 原本覆蓋到指甲緣上的base gel就會脫離皮膚造成小縫, 洗手和搽cream時便容易漏入, 漸漸黏不窂便會開始翹起。
2) 塗Base Gel前沒有徹底清潔指甲表面, 指甲上殘留有油脂時便會破壞Base gel的黏附能力, 當Base Gel未能完全黏附封鎖甲面時, 水份和油脂等物質便容易漏入, 漸漸黏不窂便會開始翹起或直接脫落。建議在塗Base gel前先以皂液洗乾淨甲面, 最好用肥皂, 因為現在前面上有很多保濕皂液會在皮膚上留有一層保濕的物質, 一樣會破壞Base gel的黏附能力, 如若想進一步清除, 可另以潔甲液抺甲面(或可以消毒藥水代替)清潔殘留物。另外亦可以於Base Gel前使用結合劑, 以瞬間帶走甲面水份以提高Base Gel的黏合力。
3) 少部人天生指甲較軟或薄, 甲面容易隨手部工作而變形, 導致與Gel分離, 便容易脫落。如若是這個原因, 便不適合使用Soak Off Gel了。

DIY Soak Off Gel tutorial

DIY Soak Off Gel tutorial:

(Optional Steps)
1. Softens and cleans the callus with cuticle softener .
2. Clip your nail to a good shape.
3. If your nails are oily type, please file and smooth out the nail surface a bit (should be slightly done.)
*Please remember to clean up your finger nails after any pre-treatments.

If you skip the above steps and you may start now!

1. Dehydrate your nail surface with gel nail cleanser.  (If you want a longer lasting result, you may choose to use primer)
2. Evenly apply a thin layer of Base Gel (the control of the thickness should be fine after several practices.)  Due to different quality, the base gel of some brands would be shrunken after UV/LED cure, in that case,  just reapply the losing part would be okay. The tricky is to leave a very narrow gap between the base gel and the skin. Use a wood stick to clean up the edge before any light cure if you did.
3. Remove the tacky residue with gel nail cleanser.
4. Apply a thin layer of Color Gel evenly and cure under the LED/UV lamp. It is always the same way in all steps of light curing. Apply a second layer of Color Gel and cure under the LED/UV lamp again. (Tips: sometimes when the color is difficult to apply evenly well or always leaving brush strokes, face your nail down to the floor and the gravity would bring the gel goes evenly due to the tractility of the gel.)
5. Apply a thin layer of Top Gel and cure under the :ED/UV lamp.
6. Remove the tacky residue with gel nail cleanser. You are DONE!
Above are the basic steps for single gel nail color application. If you want to make a french nail style, you may take a reference from my tutorials below:

French Nail Tutorials:

1. Preparation: French nail sticker, two gel nail brush, gel nail cleanser, cleaning cloth, clear gel,  pink color gel, white color gel, Base Gel, Top Gel and UV/LED cure lamp.
2. Follow the above basic steps to apply the pink color gel. If you want natural french nail, apply one layer of clear gel instead of two is fine.
3. Remember to remove the tacky residue with gel nail cleanser. (To ensure the surface is clean and dry enough for sticker.)
4. Place and adjust the french nail sticker before you stick it tightly. Ensure there is no air leaving under the edge of the sticker.
5. Apply white color gel at the front area on the nail as doing basic steps above. You will find that it is much easier to do french nail with the french nail sticker aid :)
6. After cure the white color gel under UV/LED lamp, remove the sticker slowly from one end to another end in one direction. A tidy and pretty arc is coming out!
7. Apply the clear gel to smooth out the little arc platform created by the french white edge. Cure under the UV/LED lamp.
8.  Apply the Top Coat Gel and cure under UV/LED lamp, remove the tacky residue with gel nail cleanser. DONE!!!!


If you want some advance decorations on tradition french nail, you may try the follows:

1. Little glitter beads
    For beginners, you can utilize the arc platform to hold the glitter beads at the arc, or use normal clear nail polish as glue to hold the beads at the right place you want. Apply clear gel to secure the beads and finish with Top Coat.
2. Drawing a bling bling liner
     A very easy and good way to decorate french nail is to draw a bling bling liner along the arc. It is not only can decorate your nail, it can also embellish the arc line if the edge have been failed to be created perfectly.


To Remove the Soak Off Gel:

We need to soak the gel with the gel-remover. Wraps the nail with a fully soaked cotton in a piece of tin-foil, when the remover soak through the gel, it will drop off from the nail. However, it may not 100% drop off, a little scratch may be needed.
For the tradition soaking methods, several materials you needed to prepare (cottons, tin-foil, remover, wood-stick) and several steps you needed to take: tear cotton to the sizes fit your nails, cut tin-foil into to pieces, soak the cotton fully with the remover and stick close to the nail, wrap the nail with the tin-foil and wait for 10-20 minutes.
For our newly recommended soak off pad, only one step you need~ Let's see the below pictures and find out the differences.

Traditional soak off method:


Newly Soak Off Gel Remover Pad method :

Please click here for more details of the remover pad, thank you!

2014年5月8日星期四

DIY Soak Off Gel 卸甲分享

上一期推介的Soak Off Gel 卸甲包試用反應熱烈, 多謝大家的支持!!
有熱心的會員向我們提供了卸甲照,
以下給大家分享一下:


希望大家繼續支持分享, 
LOAVE NAIL 透明Gel已上架,
按此參看。
謝謝!

2014年5月4日星期日

Soak Off Gel Remover Pad

Did you ever have troubles in removing your nail polish?
Typically with those glitter ones.

Or do you think it is possible to DIY soak-off gel removal at home? Did you ever feel tired to prepare the materials? Did you ever feel impatient in cutting tin-foil, tearing cotton pad? Did you ever have happened in tipping the nail remover and stained everywhere?

No matter you have or have not run into the above problems,
here is a good news to everyone who like or need to do nail polish:
Soak Off Gel Remover Pad!

Soak Off Gel Remover Pad is an innovative designed product which optimize the nail polish/ gel nail removing process. Just a few easy steps and you can DIY your soak off gel removing at your home. SAVE TIME. SAVE MONEY!

Or, if you are a salon nail art artist providing soak off gel removing service, Soak Off Gel Remover Pad allows you finish the works tidily and more professionally.

Order now!!


We now provide free samples for our members. (Only for HKs' this time.)
If you want to try our free samples, please register at: www.melodi-nail.com